
What is this?
Cloudflare pages is a web app hosting platform that hosts websites for free. It’s free to anyone with a Cloudflare account, and super easy to set up!
I’ll be using the Hugo static site generator. I have a full tutorial on how to get this set up and working in your own environment here.
📝 Requirements
- A Cloudflare account
- A GitHub account
- GitHub desktop
- An IDE to work in (such as Visual Studio Code)
- Your static site files
- Don’t know where to get started? I have a post on this!
🔍 Prepare GitHub
🚩 Create a repository
First, let’s get started by creating the site’s repository. This can be named whatever you want:
An example for me would be:
my-websiteMake sure this is set to
publicYou can initalize a README if you would like
If you’re using Jekyll, it may be a good idea to initalize with a
.gitignore
🔽 Clone the repository
Now, we’ll get the repository down to the local machine to work on it. You can either do this in a GUI with GitHub Desktop or by using the Git CLI with the following command:
| |
Add necessary files
🔼 Open in your IDE
- It’s super easy to work with a git repository in an IDE, such as Visual Studio code. But your favorite IDE should work anyways.
- Open up the directory you cloned your repository to
➕ Add site files
Get your hugo project files into this repository’s directory (if you are using Hugo). Or again, other site generators will do just fine.
✅ Commit
Now, let’s get everything commited to GitHub.
- In GitHub Desktop, enter a message and click
Commiton the bottom-left of the application - In Git CLI, cd into your cloned directory and enter the following commands, substituting your own message if you would like:
| |
🔍 Get cloudflare set up
- Log into the cloudflare dashboard, and head over to the
Pagestab:
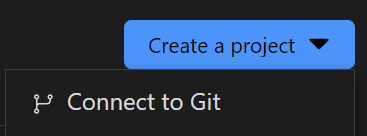
- Click
Create a Project>Connect to Git
🔗 Link GitHub
- Click
Add accountto link your GitHub account - Once linked, click the account dropdown, and select your account
- Select the repository you created from the list that shows
- Click
Begin setup
⚙️ Project Settings
If you would like, go ahead and make a few tweaks:
- Name the project whatever you would like
- Such as “My website”
- Make sure “master” is set as the Production branch
- Leave Framework preset set as none
- If you are using anything other than Hugo, check out the dropdown to see if your framework is there!
- Enter
hugo --minifyas the build command - Enter
publicas the Build output directory
👨💻 Environment variables
In order to specify a Hugo version, we will need to configure an environment variable
You can find the latest Hugo version here
- Click the
Environment variableslink - Click the
Add variablebutton - Use the following in the text boxes:
- Variable name:
HUGO_VERSION - Value:
0.98.0- This is as of July 13, 2022. The latest version may be different for you
- Variable name:
- Click
Save and Deploy
✅ Watch the magic happen!
Now, you will see a terminal output, giving you the status of the deployment.
If it worked, it will present you with a URL for you to go to with your website!
A few references
- Deploying Hugo with GitHub actions
- GitHub actions documentation
- This website’s repository!
- As I use hugo, this contains the necessary actions workflow file and directory structure for Hugo