A static website is a plain and simple site with some HTML and CSS, without the need for a database or a beefy server.
Hugo is one of many different static site generators. The most popular is called Jekyll, and is a bit simpler to use than Hugo. It’s mostly personal preference, but here we’ll be going through setup for Hugo.
Requirements
- A Linux computer or virtual machine with Docker and the Compose plugin installed
- You can install Docker using their official documentation
Optionals
- Traefik reverse proxy to easily secure with TLS
📁 Create directories
Firstly, you’ll have to create two directories. One of these will store the Dockge compose file (/opt/dockge), the other will store all of your other stacks (/opt/stacks).
- Log into your server
- Run the following to creat the directories:
| |
🐋 Create and spin up Dockge container
📋 Create project
- With the directories created,
cdinto the/opt/dockgedirectory and create thecompose.ymlfile
| |
- Edit the file
| |
- Add the following contents to the file (the defaults should be fine for getting started quick):
- This example can also be found on this projects repository
- You may notice the tag is
1, this seems to be the tag used for the latest version, you can also get a specific version from the releases page of the repository
| |
✨ Spin up Dockge
- With the
composefile created, spin it up withdocker compose
| |
- This will pull the latest version of Dockge and run it
✨ Connect and perform first time setup
- Get the IP address of your machine using the command
ip address- This is typically found in
eth0
- This is typically found in
- Open a web browser and navigate to http://your.ip.address.here:5001
- Ex.
http://192.168.1.10:5001
- Ex.
- You should be presented with a page to create your admin account:
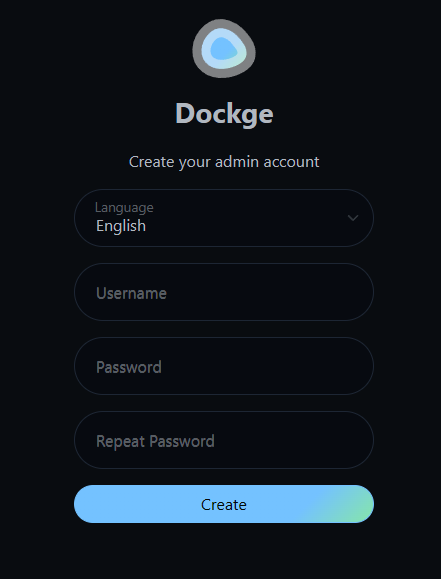
- Fill in the details as you see fit, and click
Create - This should take you to the Dockge home page
✅ Using Dockge
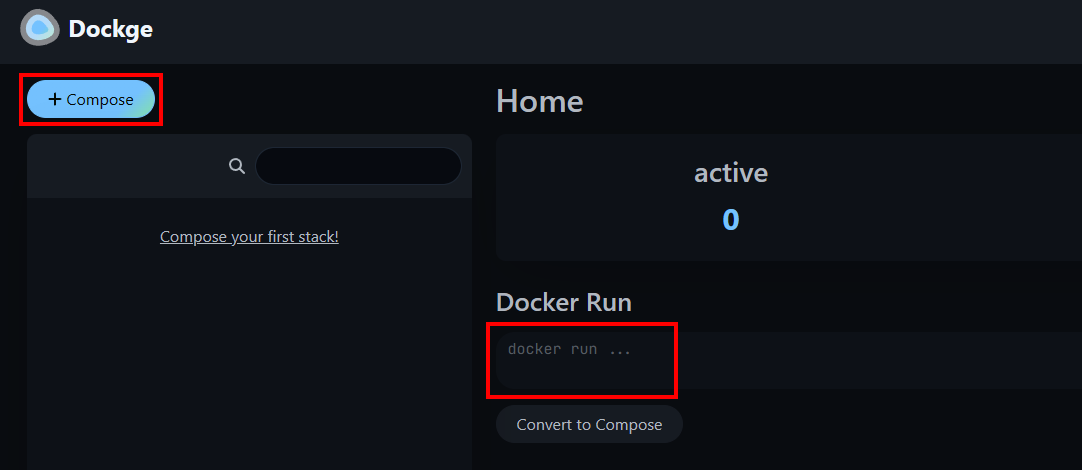
📃 Home page
The home page shows you current managed and non-managed stacks. Managed stacks are in the directory created earlier, /opt/stacks.
- You can create a stack by clicking the
+ Composebutton, or by entering a docker run command to convert it to a compose file
📃 Compose page
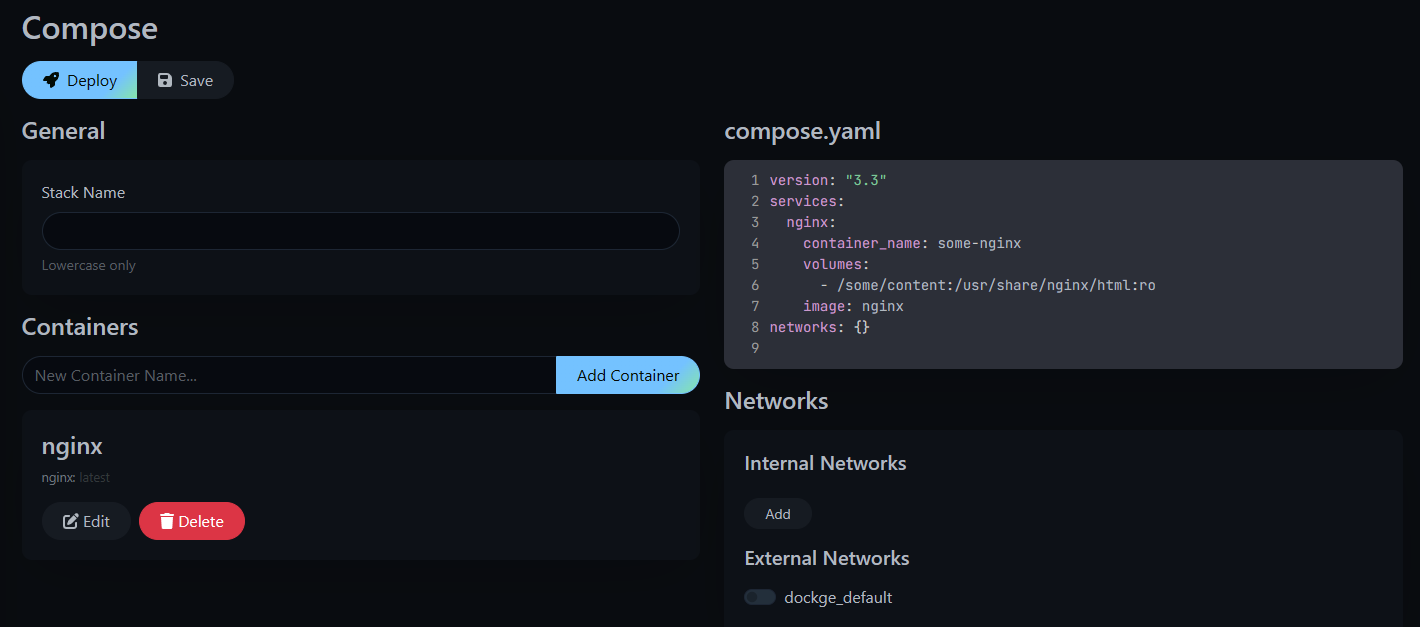
Clicking the + Compose button or converting a docker run command will take you to the Compose page.
Let’s say you want to spin up nginx with the command:
| |
Entering this to be converted to Compose will result with the following page:
 \
\
You can managed more container settings by clicking the Edit button under Containers.
⬆️ Starting a container
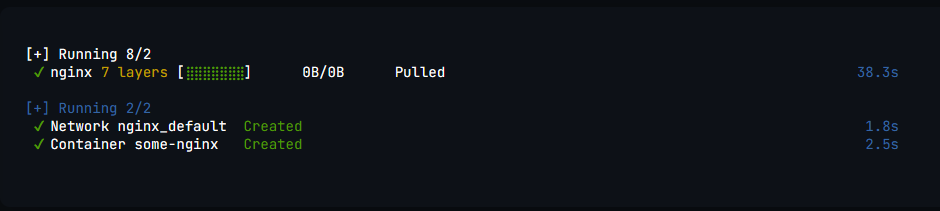
Once you’re satisfied with the container, click Deploy and watch the magic happen!
Dockge will do the rest of the work, and provide a realtime terminal output of the progress, and present with the result:
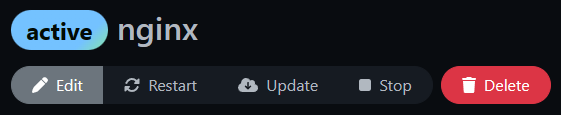
🕹️ Container controls
Once the container is running, it will show with an active badge next to it, and present you with a few options to manage it. All of which are pretty self-explanatory:
✈️ Using with Traefik
To proxy Dockge through traefik, there are two options: If Dockge is running on the same local server as the Traefik container, or on a remote server. This will go over the labels for running on the same server as Traefik.
✅ On same server as Traefik container
- Edit your Dockge
compose.ymlfile:
| |
- Add the following labels as such:
| |
- After updating, recreate the container:
| |
As long as your Traefik instance is working, and all labels match your instance settings (you may need to change some things based on how you have Traefik set up), you should be able to navigate to your subdomain name!
⬆️ Updating Dockge
To update Dockge, run the following commands:
| |
These command will:
- Change your directory to the where the Dockge
compose.ymlfile is - Pull the latest version of Dockge (
louislam/dockge:1) - Recreate the container with the latest pulled image